In previous article we discussed how to create empty virtual machine. This article describes how to install Oracle Linux 5.4 x86 version in Desktop mode. Desktop mode allows you to work in graphical environment with graphical editor like gedit, browser like firefox and other tools. You can also check another article which describes minimal Linux installation with very limited number of packages needed for Oracle Server.
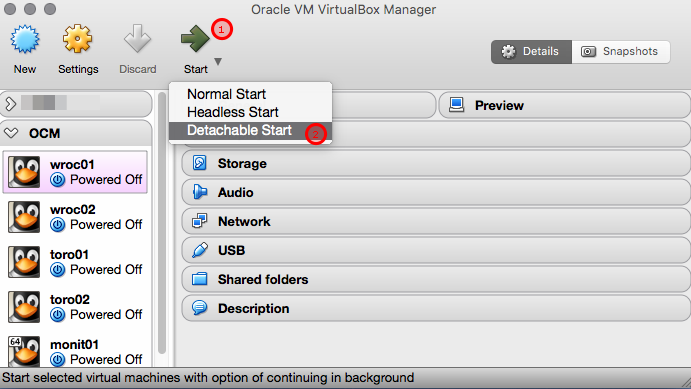
Click on machine which you want to start, then click “Start” (1) and choose “Detachable Start” option (2) from the list. This option allows you to save some physical resources, run machine in background and connect via SSH later.
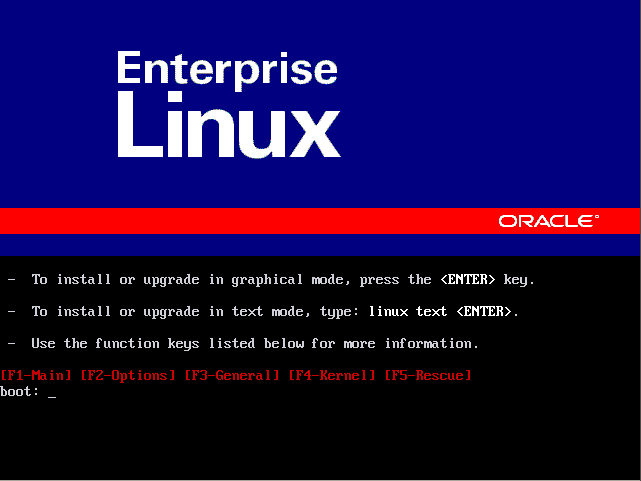
On boot screen press ENTER to continue
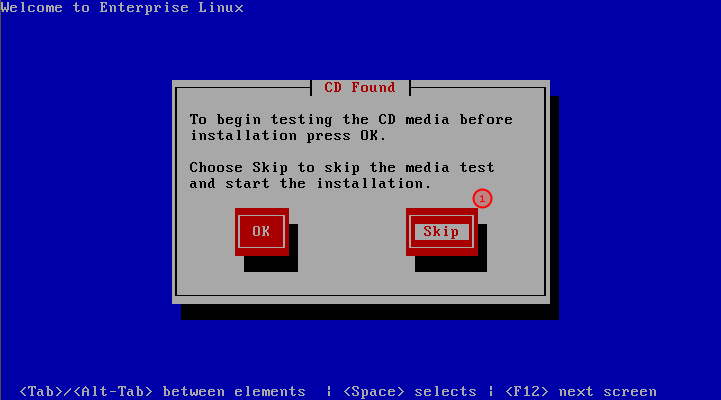
Use TAB to switch to Skip option (2) and press ENTER to continue
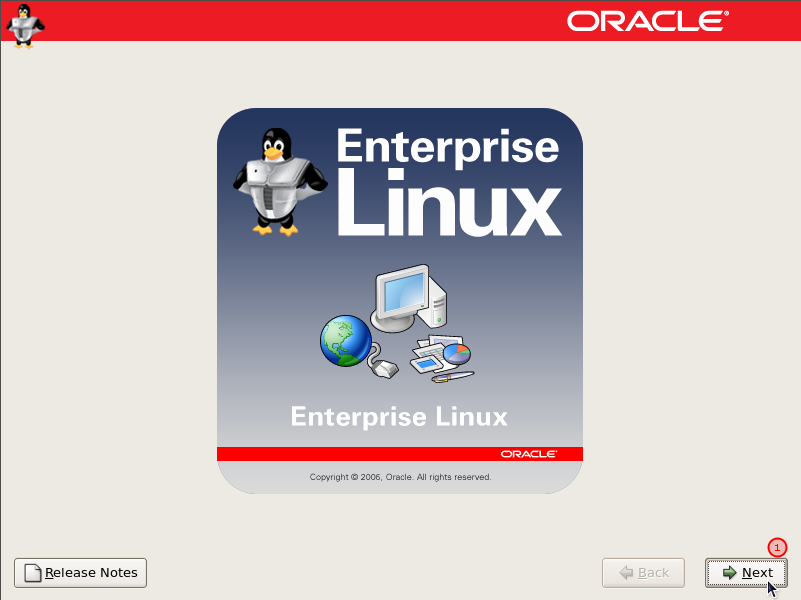
Click Next (1) to continue
From the list choose language which you want to be used for installation process and click Next (1) to continue

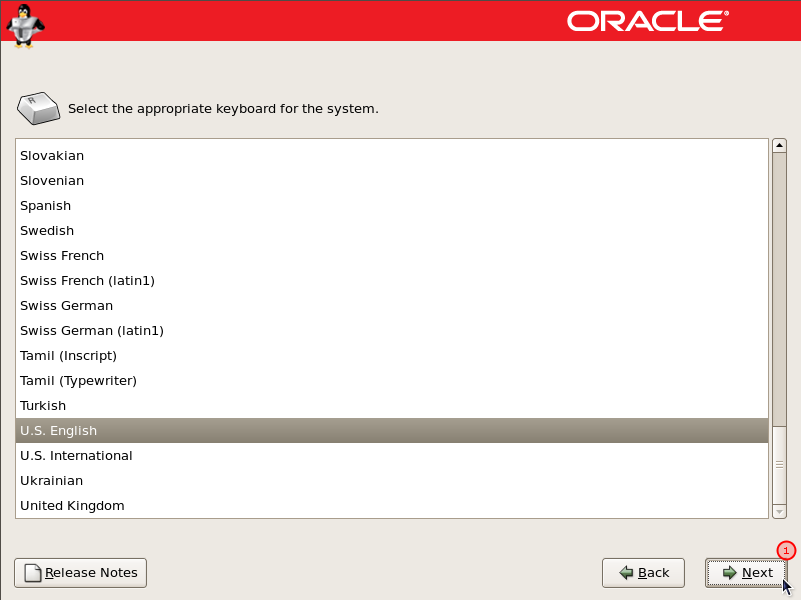
Choose your favorite keyboard from the list and click Next (1) to continue
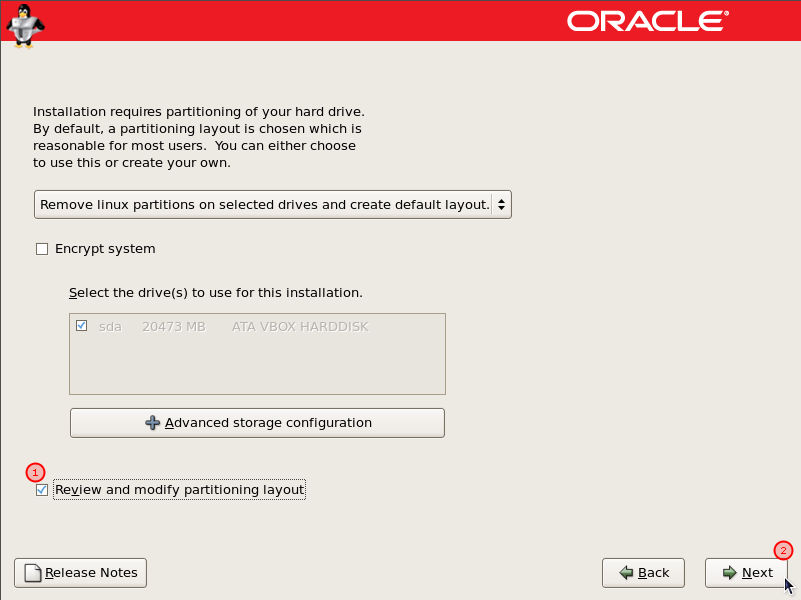
On this screen don’t change anything but mark checkbox “review and modify partitioning layout” (1) and click Next (2) to continue
Confirm to remove all partitions and create default partitioning layout by clicking “Yes” (1)

Click on VolGroup01 name (1) and Edit (2) to change default layout

We need to increase SWAP, which is assigned to LogVol01, up to 4G. To do this we need to decrease size of LogVol00. Click on LogVol00 (1) and Edit (2) to change default size of this volume
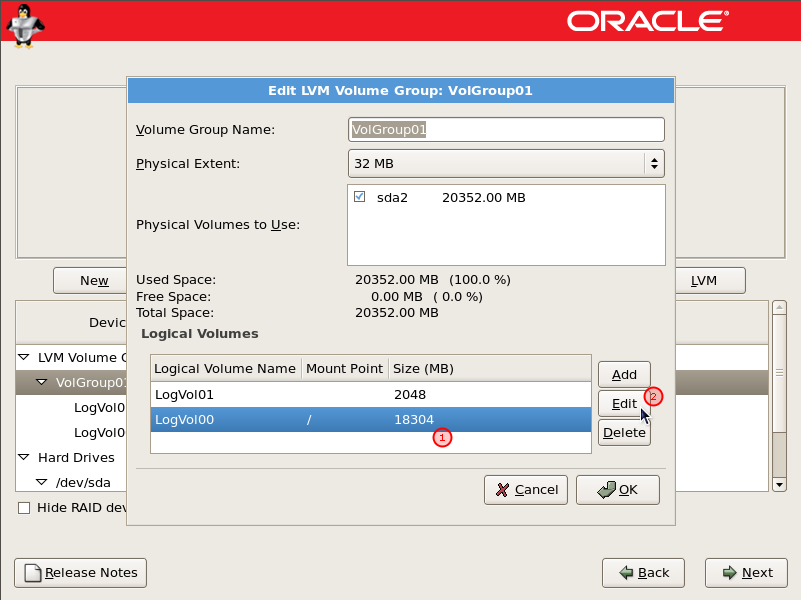
Decrease size of LogVol00 to 16256MB and increase size of LogVol01 to 4096MB and click OK to confirm (2)

You should see that values were updated and swap has 4G of storage. If values are different go to the previous point and fix them.
Click Next (2) to proceed.
Click Next (2) to proceed.

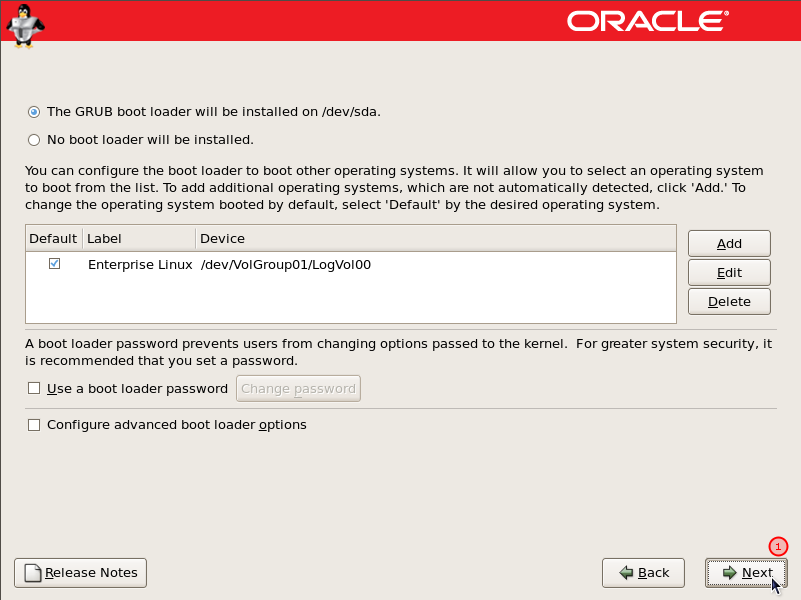
Confirm boot loader settings and click Next (1) to continue
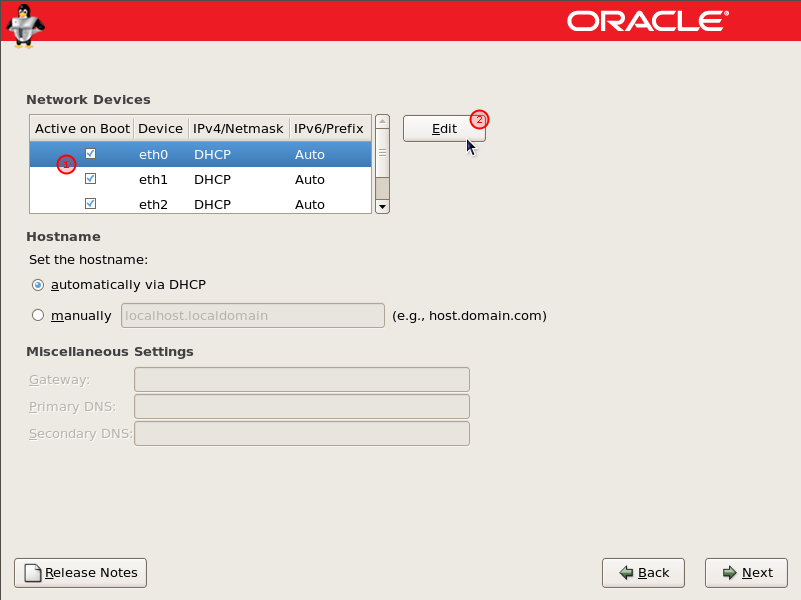
Click on eth0 interface (1) and edit (2) to change settings. This interface will be used as public interface of RAC environment
For IPv4 change settings to Manual configuration (1) and set proper values for public interface (192.168.54.11/24).
Disable IPv6 settings – uncheck “Enable IPv6 support” (2) and click “OK” (3) to continue
Disable IPv6 settings – uncheck “Enable IPv6 support” (2) and click “OK” (3) to continue

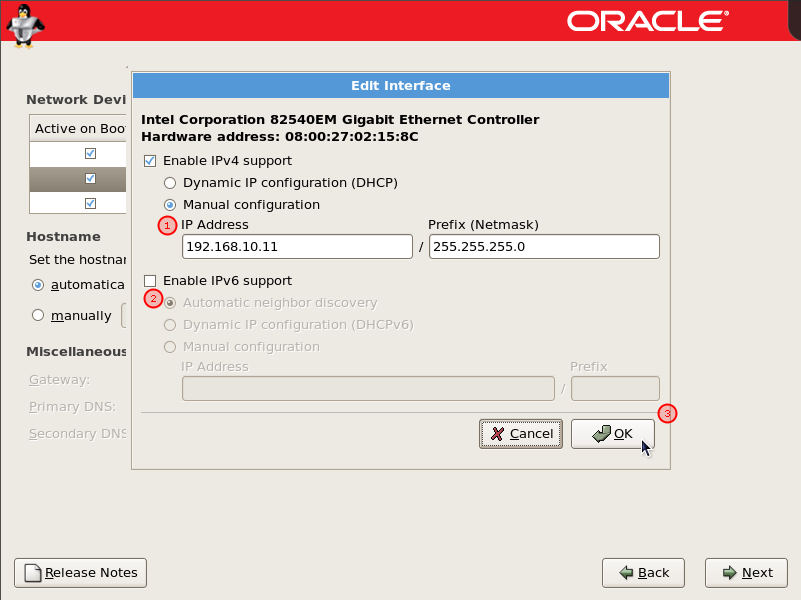
For IPv4 change settings to Manual configuration (1) and set proper values for private interface (192.168.10.11/24).
Disable IPv6 settings – uncheck “Enable IPv6 support” (2) and click “OK” (3) to continue
Disable IPv6 settings – uncheck “Enable IPv6 support” (2) and click “OK” (3) to continue
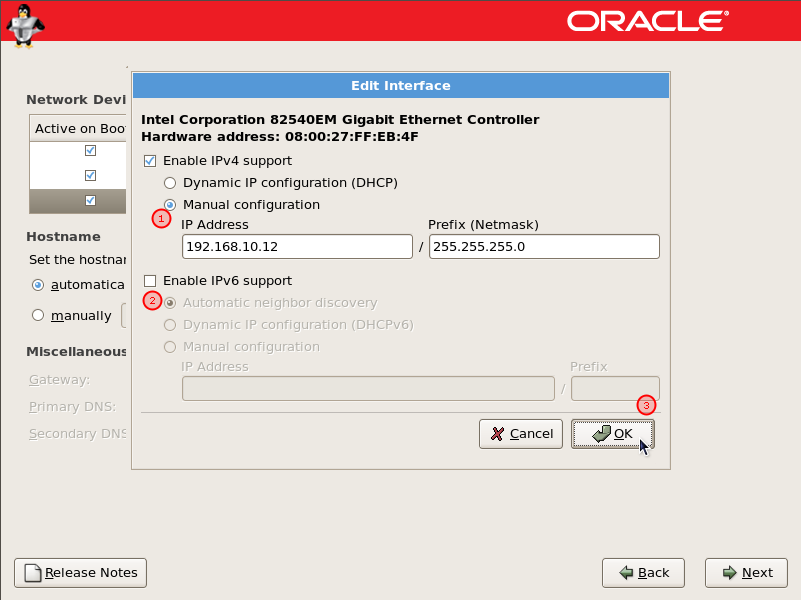
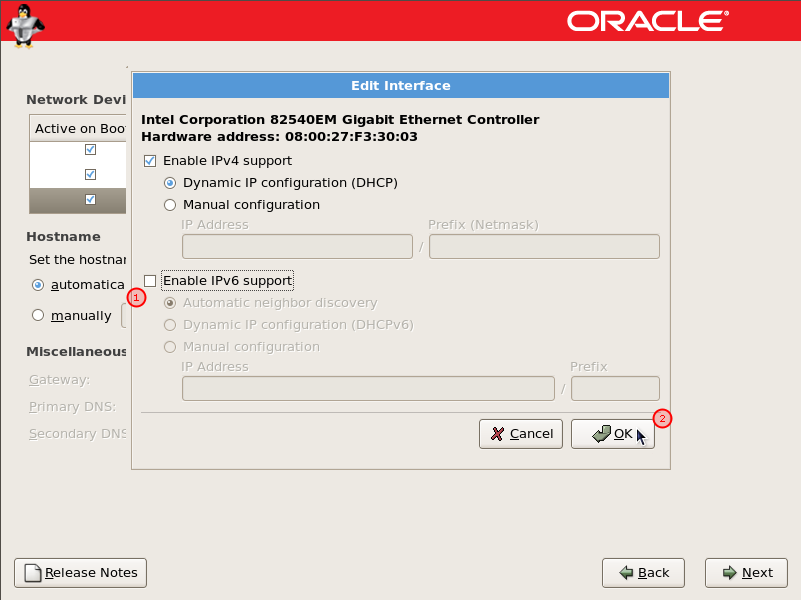
For IPv4 change settings to Manual configuration (1) and set proper values for private interface (192.168.10.12/24).
Disable IPv6 settings – uncheck “Enable IPv6 support” (2) and click “OK” (3) to continue
Disable IPv6 settings – uncheck “Enable IPv6 support” (2) and click “OK” (3) to continue
Here leave IPv4 settings by default as this interface is set to NAT IP address will be assigned automatically.
Disable IPv6 settings – uncheck “Enable IPv6 support” (1) and click “OK” (2) to continue
Disable IPv6 settings – uncheck “Enable IPv6 support” (1) and click “OK” (2) to continue
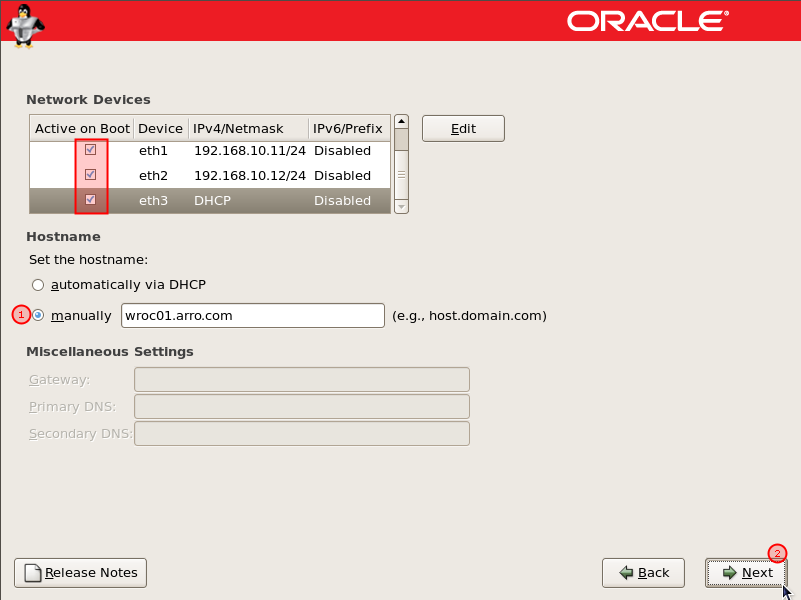
Make sure that all devices have “Active on boot” option set.
Provide name of the host (1) and click Next to continue (2)
Provide name of the host (1) and click Next to continue (2)
Choose a region for environment settings and click next (1) to continue

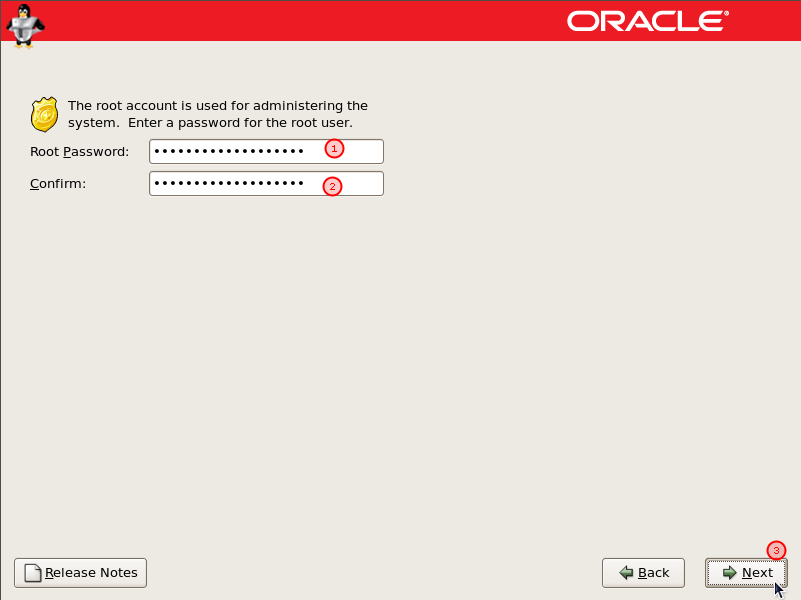
Provide root password (1) and confirm it by typing the same password (2) and click Next (3) to continue
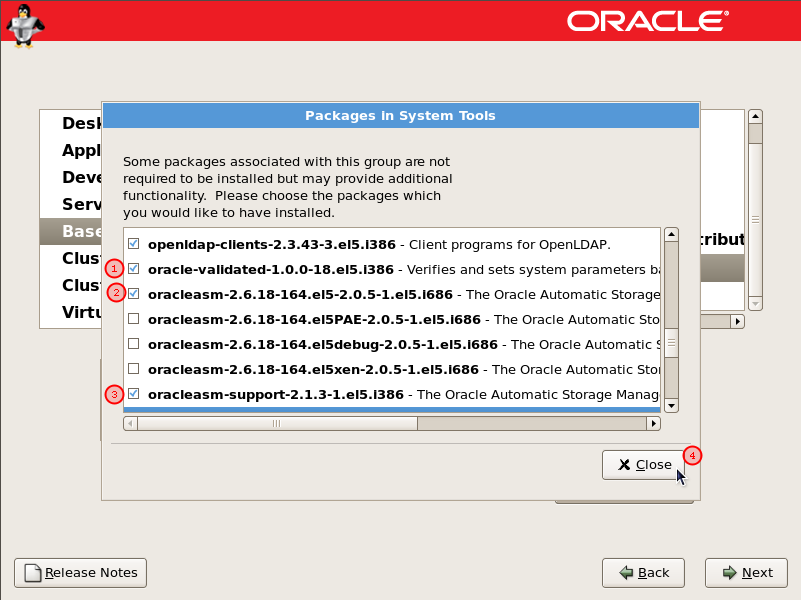
We want to add some packages (oracle-validated, oracleasm, oracleasm-support) from repository.
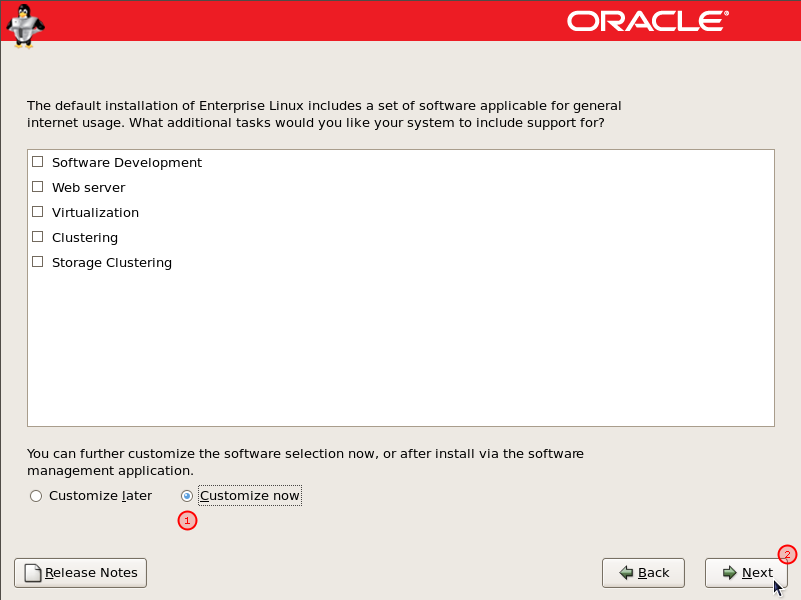
Choose “Customize now” (1) option and next
Choose “Customize now” (1) option and next
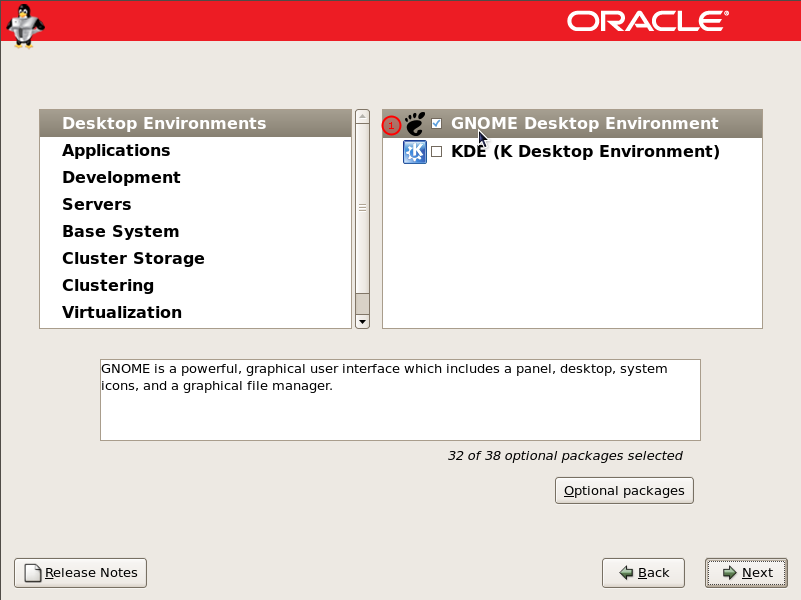
Be sure that all default options are set in all subcategories (Desktop Environment – Gnome (1), Application etc) by clicking one by one on the left side
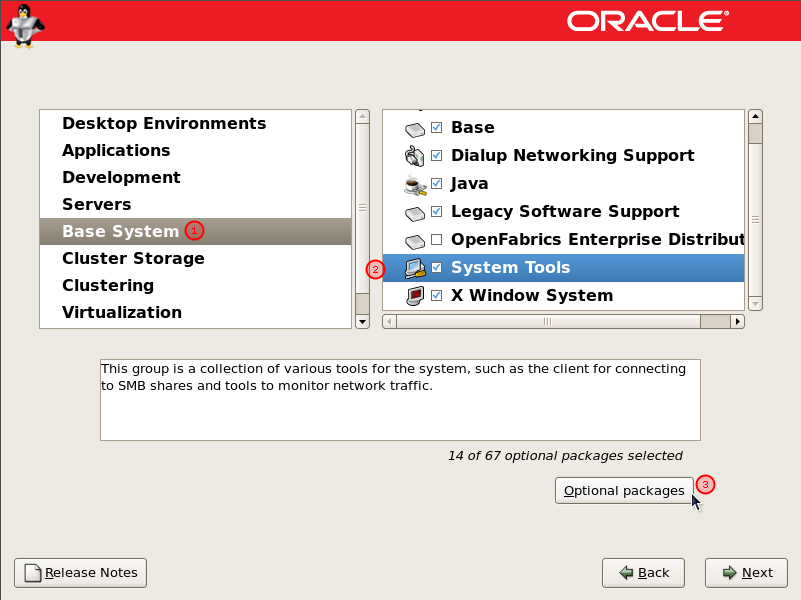
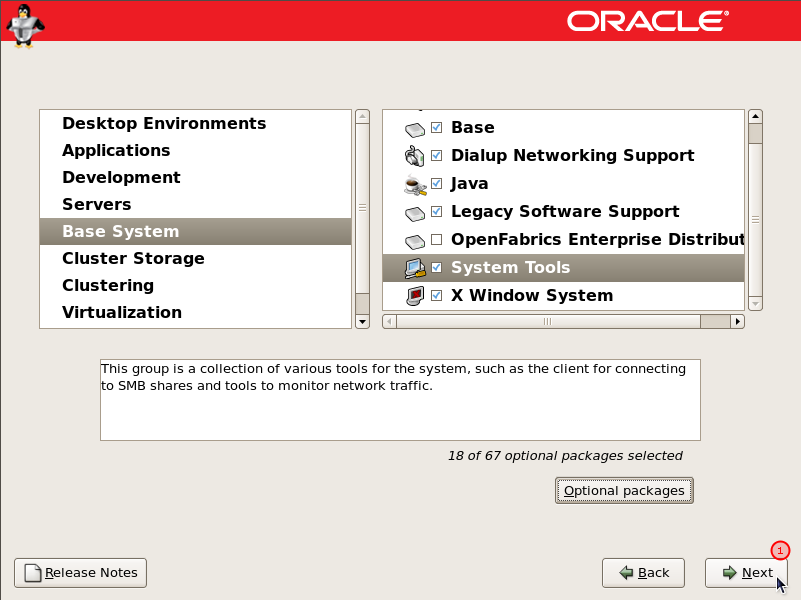
To install additional packages related to Oracle database click “Base systems” (1) from the left side and find “System Tools” (2), mark it and click on “optional packages” (3)
Find on the list packages oracle-validated, oracleasm and oracleasm-support.
oracleasm and oracleasm-support are needed for databases on ASM and oracle-validated installs required packages for Oracle Database and sets the recommended system parameters. For more info about oracle-validated package you can check note “Linux OS Installation with Reduced Set of Packages for Running Oracle Database Server (Doc ID 728346.1)”
oracleasm and oracleasm-support are needed for databases on ASM and oracle-validated installs required packages for Oracle Database and sets the recommended system parameters. For more info about oracle-validated package you can check note “Linux OS Installation with Reduced Set of Packages for Running Oracle Database Server (Doc ID 728346.1)”
Click next (1) to continue
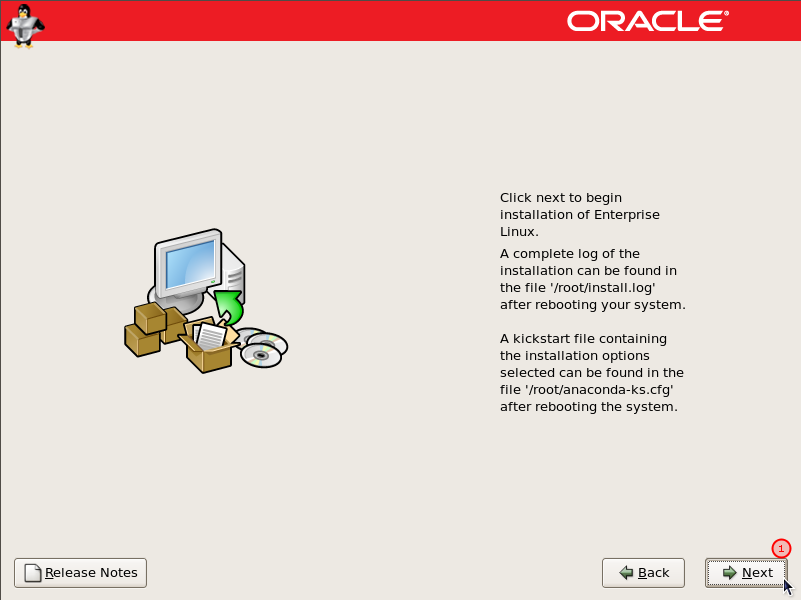
Click next to start installation
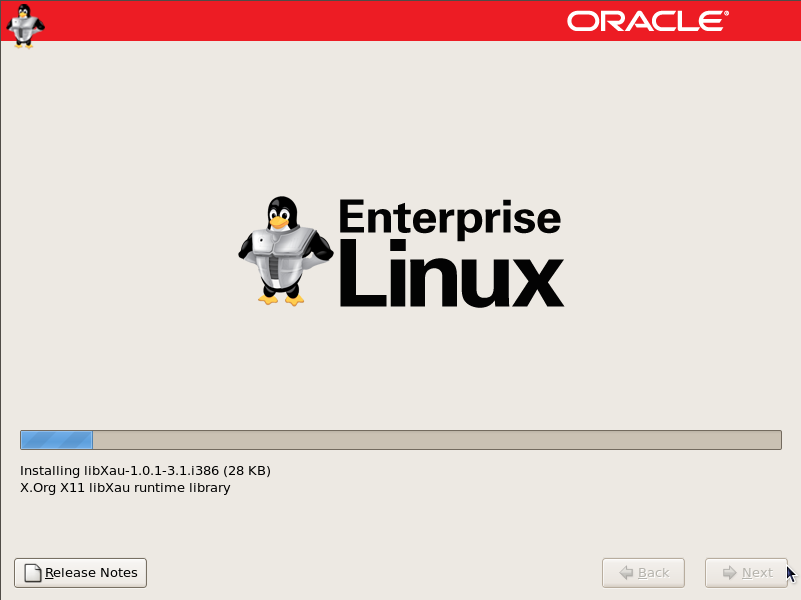
Installation in progress
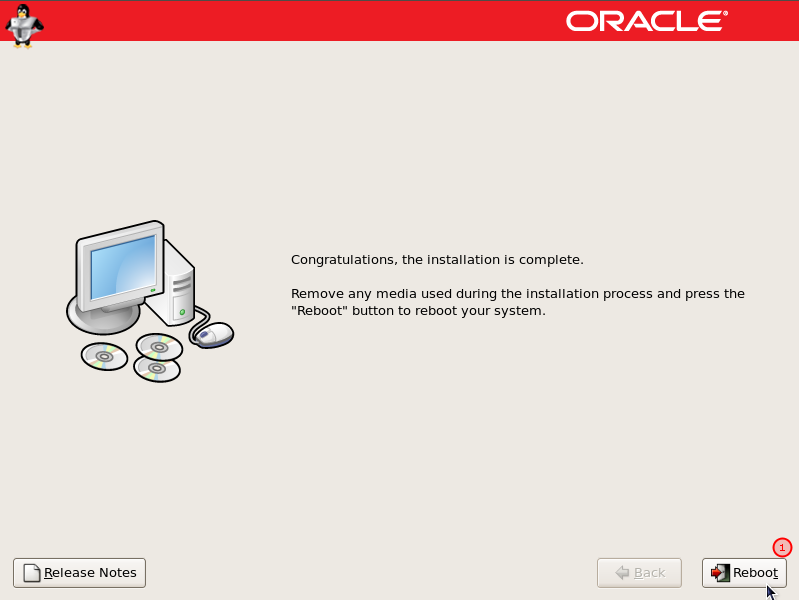
Once installation is completed you need to restart machine. Press “Reboot” (1) to continue
After reboot you will be asked to configure environment before you continue. On Welcome screen click “Forward” (1) to continue

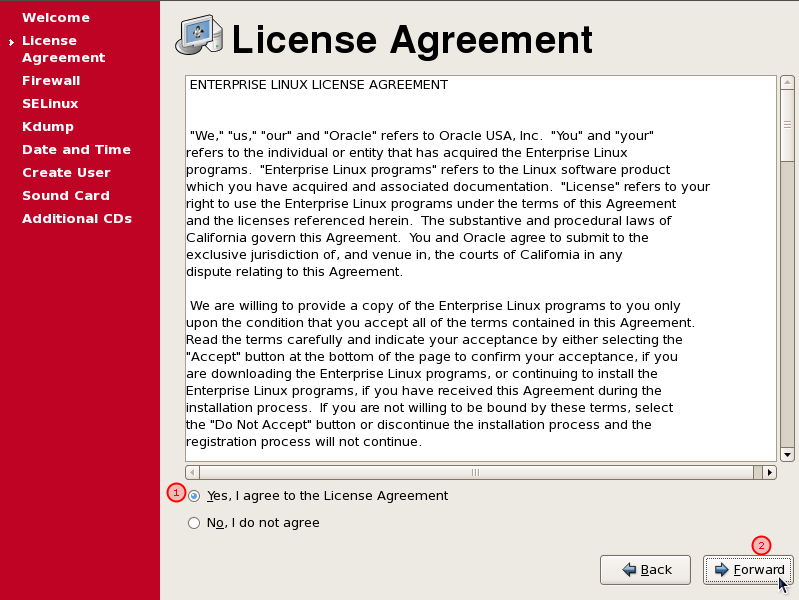
Read the license agreement and mark “Yes, I agree…” (1) and “Forward” to continue (2)
Choose “Disabled” (1) option from listbox to disable firewall and “Forward” (2) to continue
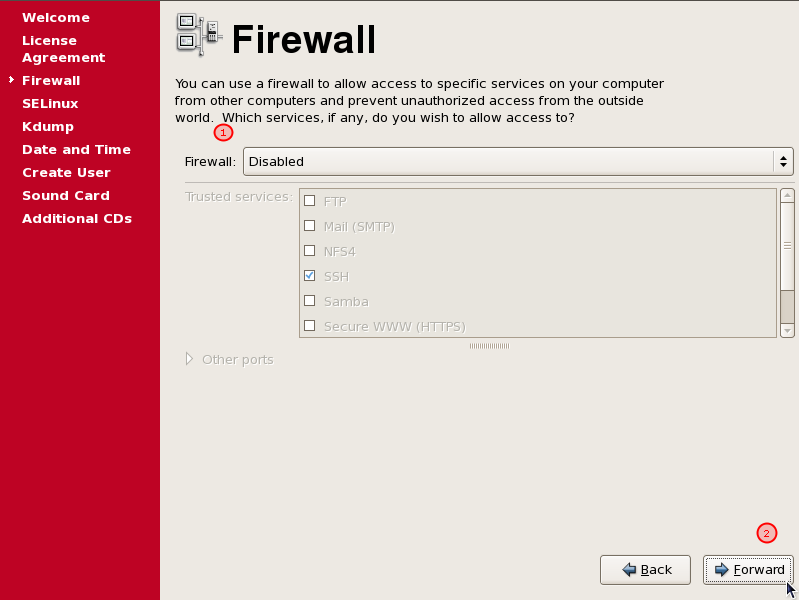
Click “Yes” (1) to confirm disabling firewall

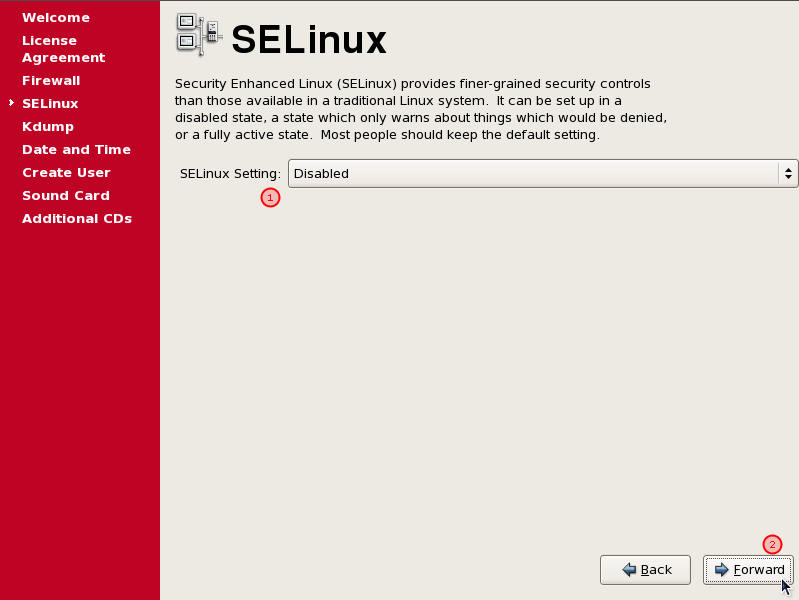
Choose “Disabled” (1) option from listbox to disable SELinux security control and “Forward” (2) to continue
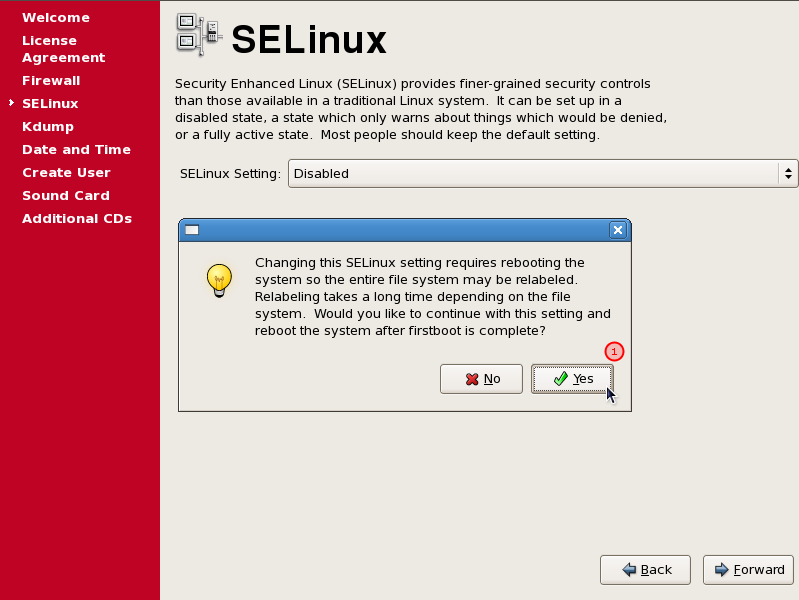
Click “Yes” (1) to confirm that you want to disable SELinux setting
Disable kdump configuration. Uncheck “Enable (kdump)” (1) and click “Forward” (2) to continue

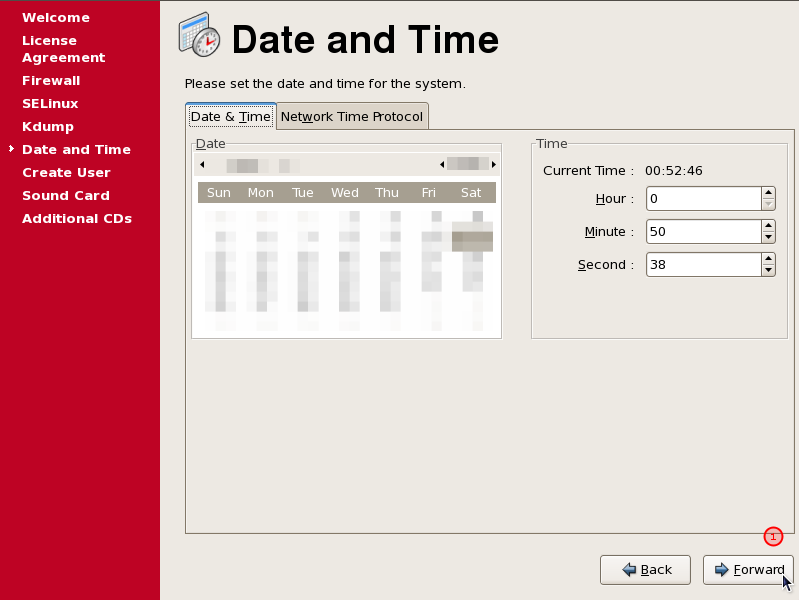
Verify settings for date and time and click “Forward” to continue
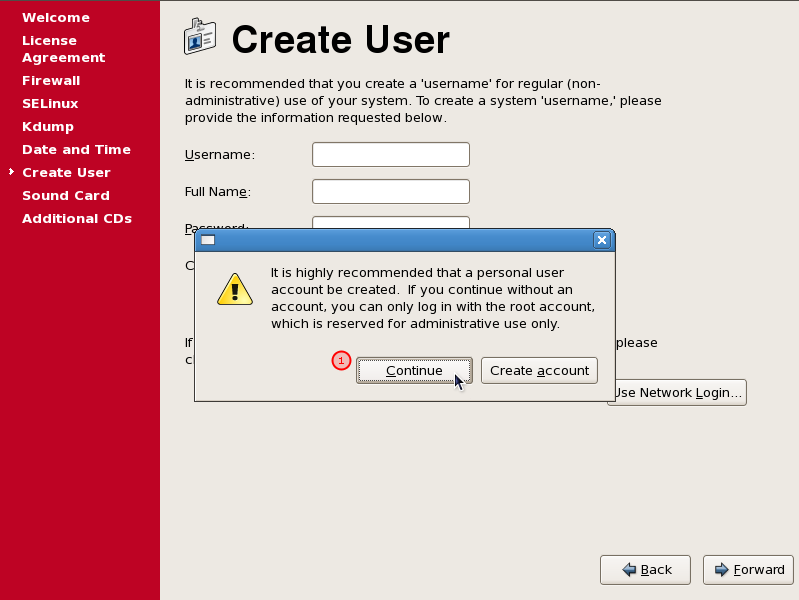
We don’t want to create any additional user in this step as oracle user was created by oracle-validated component.
Just click “Forward” (1) to continue
Just click “Forward” (1) to continue

Confirm that we want to continue without creating additional account. Click “Continue” (1) to proceed
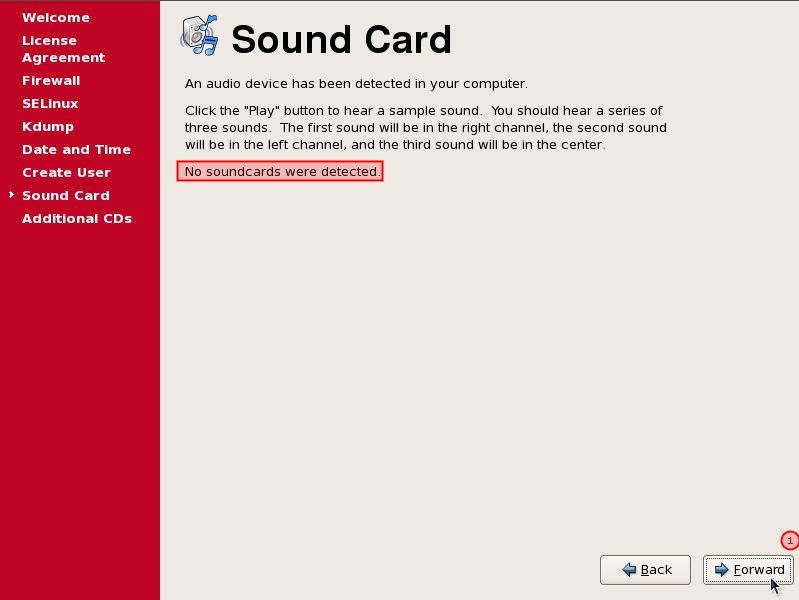
There are no settings visible for Sound Card as we didn’t define any sound card in VirtualMachine settings before. Click “Forward” (1) to continue
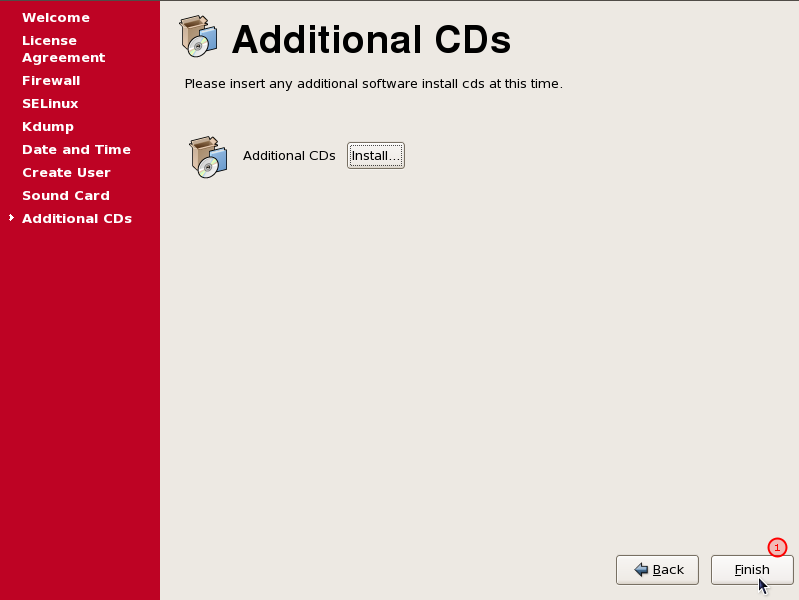
We don’t have any additional CD’s to be installed so click “Finish” (1) to reboot machine
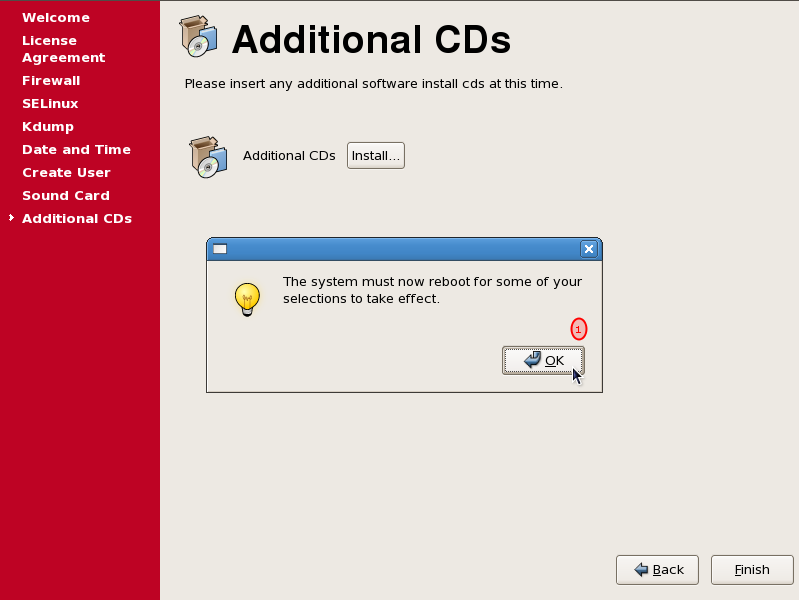
Press “OK” (1) to continue with reboot
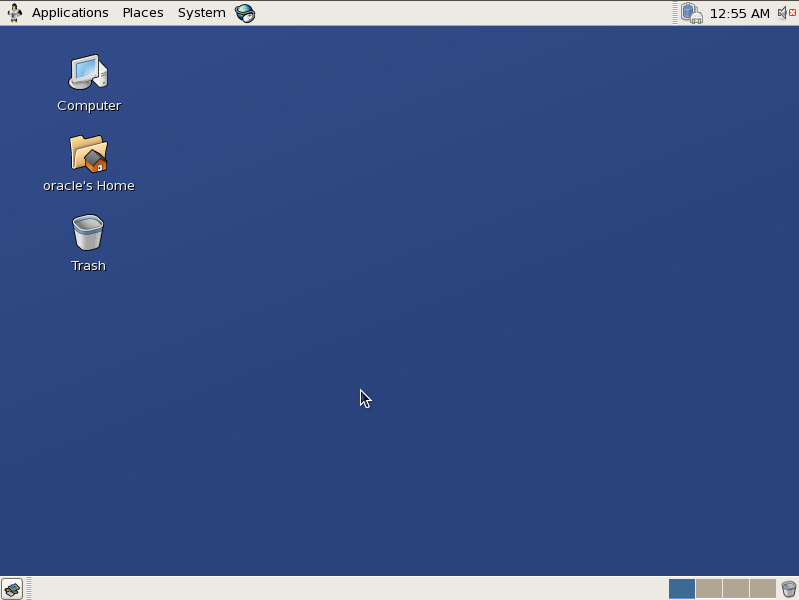
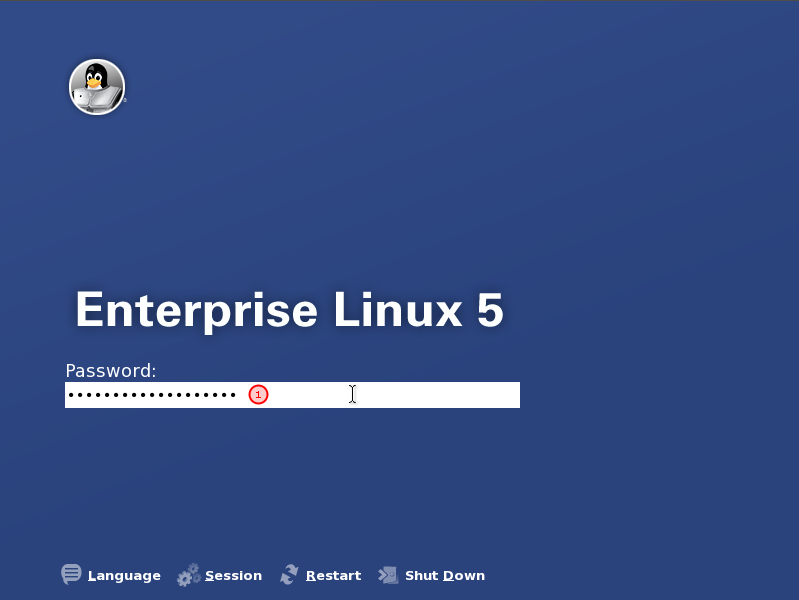
After restart on welcome screen in username field put oracle (1) as username

Use your root password as oracle password (1) to authenticate (however we didn’t set password for oracle user during the installation , root password was assigned also for oracle user by default)
This is the end of the installation part – you are logged in Desktop Linux as oracle user